
Nitrate Sample Preparation
Introduction
The denitrifier method uses Pseudomonas aureofaciens bacteria to denitrify nitrate (NO3) to nitrous oxide (N2O). The general flow of work, assuming all supplies are on hand, is to inoculate bottles on day 1, harvest those bottles and inject your samples on day 2, and start the mass spectrometer on day 3. Some flexibility exists within this framework. This particular method focuses on days 1 and 2, as well as the prep leading up to those days.
The bacteria method is a bit of a blind guessing game in a lab without proper microbological tools. As such, we are unable to measure the number of active cells in a batch. We are unable to measure their activity. We go by various voodoo techniques that include pellet color and pellet size, but in the end we only know if a harvest was good after we see data come out of Irene. Here are the thoughts of Emily Giedraitis, a technician who battled with these bugs for a year.
Safety
Appropriate precautions should be taken when handling sharps. You will encounter needles in this method. Wear nitrile gloves. The bacteria we are working with is a common soil bacteria and is not cause for alarm. If you puncture yourself, apply iodine from the first aid pack immediately as an irritation will develop. Again, this is not cause for alarm. You are simply taking action to prevent irritation. You will also encounter reagents and you should wear appropriate protective clothing and work in the hood as needed (see the SDS for each reagent if not familiar with how to handle it).
Bacterial Method Supplies
This section outlines how to make everything needed for the denitrifier method. Ideally, everything in this section has been done weeks in advance.
Petri Plate Preparation

Petri plates are used to grow colonies to ensure you are working with a pure batch without contaminant species.
- Follow the recipe on the container. Add 20 g Tryptic Soy Agar into a 500 mL media bottle and 500 mL 18 M-ohm water.
- Place a plastic ring on top of the threads, cap the bottle and shake. Make sure everything has dissolved completely.
- Autoclave the bottle (see autoclaving section below).
- Use autoclave gloves to handle hot bottle.
- The rest of this preparation should be conducted under the laminar flow hood. This is a basic unit that simply bathes your work area in sterile (or near sterile) air. Plug the fan in to the right of the unit to turn it on.
- Spread out new plates under the laminar flow hood with the hood on.
- Pour plates under the laminar flow hood (swirling the bottle periodically so that the solution remains homogenous while pouring)
- Let plates sit until cooled and solid under the laminar flow hood (5-10 minutes).
- Place petri lid on top of each cooled plate, wrap with parafilm, label with the date plate was created, and store upside-down in refrigerator in room 303B.
Growth Media Preparation
The growth media is used, along with the nutrient buffer stock described below, to grow up a batch of bacteria to be harvested for a run of samples.
- Working in a fume hood, add 25 mL of Tryptic Soy Broth into a 500 mL bottle (use the little beaker that is left in the bucket to measure).
- Slowly add DI water to the top rib at the shoulder of the bottle.
- Repeat steps 1 and 2 to make a total of 8 bottles like this to be autoclaved all at once.
- Put on pouring rings, flange side up (see photo). USE PURPLE CAPS. Tighten caps and shake well until the broth is fully dissolved.
- Loosen caps slightly before placing in autoclave.
- Autoclave as in
- When cool, label with autoclave date and store in bacteria cabinet in 303B.

Nutrient Buffer Stock Preparation
The nutrient buffer stock provides supplemental nutrients to the bacteria in addition to the media that is outlined above. The original method used by IsoLab and Sigman et al. 2001 and Casciotti et al. 2002 had the growth media and nutrient buffer stock together as one growth media. Also, Casciotti et al. 2002 specifies Potassium phosphate monobasic (KH2PO4). Meredith Hastings (post doc at the time who, with Julia Jarvis set up the denitrifier method) chose to use K2HPO4 thinking it might be a better buffer when bacterial stocks kept dying off (Meredith, personal communication). The Casciotti method also specifies ammonium chloride where we use ammonium sulfate. This was a choice early in the setup of the method in IsoLab based on what was available at the time (Meredith Hastings, personal communication). The goal is to make nitrogen other than nitrate available for building. It's not clear to me if the sulfate is affecting things.
- Weigh 50 g KNO3 (Potassium nitrate), 250 g K2HPO4 (Potassium phosphate) and 100 g (NH4)2SO4 (ammonium sulfate) into a 2.5 L bottle.
- Add 2 L deionized water (within 3-4 inches of bottle neck) and stir or shake until completely dissolved.
- Distribute 500 mL into 500 mL bottles.
- Put on pour rings. USE PURPLE CAPS. Keep caps loose on bottles.
- Autoclave as described below in autoclaving section.
- When cool, label with ingredients and prep date and store in bacteria lab cabinet in room 303B.
Nitrate-free Media Preparation
The nitrate-free media is used during a harvest to keep the bacteria growing, but depriving them of excess nitrate so they must use nitrate from samples. Note the tryptic soy broth has nitrate in it, so this "nitrate-free" media is not truly free of nitrate but we continue to call it this in an effort to differentiate it from the above growth media. Also note, in the original Sigman et al. 2001 method, the growth media was used, not fresh media as is described here.
- Weigh 60 g Tryptic Soy Broth, 10 g K2HPO4 (Potassium phosphate), and 4 g (NH4)2SO4 (ammonium sulfate) into a 2.5 L bottle.
- Add 2 L deionized water (within 3-4 inches of bottle neck) and stir or shake until completely dissolved.
- Distribute Nitrate-Free Media into desired bottles (400-500 mL into 500 mL bottles.)
- Put on pour rings. USE ORANGE CAPS. Keep caps loose on media bottles.
- Autoclave as described below in the autoclaving section.
- When cool, label with ingredients and prep date and store in bacteria lab cabinet in room 303B.
Autoclaving
We employ a more archaic manual method for autoclaving by using a hot plate and regular kitchen pressure cooker. The goal is to heat materials for 30 minutes at 121 °C. Johnson Hall does have an automated autoclave but due to excessive down-time and unreliable availability, we have chosen our alternative. We include instructions for both methods in case someone wants to use the large autoclave. The manual for the pressure cooker is here.
- Put the hot plate in a hood, preferably the one closest to the door in 303B. While a hood is not essential, some folks complain of the wonderful media smell.
- You can fit up to eight 500 mL media bottles in the pressure cooker at once. For efficiency, try to fill the pressure cooker (i.e. don't just do a few bottles).
- With the media bottles sitting on the bottom plate of the pressure cooker, add water until the 1/3 of the media bottle is covered (~ 5 cm of the bottle is submerged).
- Wipe the lid and the base with a bit of olive oil to ensure a good seal. This is what the pressure cooker instructions say. In practice, it doesn't appear to be essential.
- CAREFULLY place the pressure cooker lid on the base and rotate into place. Care is needed because if the sealing surfaces are scratched or disfigured, the pressure cooker won't seal.
- Clamp the bolts down gradually and make sure the lid is level.
- Put the weight with the 15 lb port over the lid vent.
- Put the entire pressure cooker on the hot plate and turn the hot plate to maximum.
- Wrap a bit of foil halfway around the front of the pressure cooker and top 2 cm of the hot plate to prevent the hood air flow from keeping it too cool. Also, leave the hood sash up
- It will take about an hour to get to 15 lbs. To be sterile, the pressure cooker must maintain 15 lbs (121 °C) for 30 minutes. You will know it is at 15 lbs because the 15 lb weight will begin to hiss as pressure is released.
- When done, turn the heat off, remove the foil, and use the autoclave gloves to pick the pressure cooker up and set it down next to the hotplate in the hood.
- Allow the pressure cooker to cool and reach 0 lbs before removing the weight and opening the lid. You will still need the autoclave gloves on to do this.
- With the autoclave gloves still on, tighten all the media bottle lids -- but not too tight, or you won't be able to loosen them later when you want to use them.


If you want to have a go with the formal autoclave that we used to use, here are the old instructions:
- Try to fill the autoclave tray for efficiency.
- Use autoclave indicating tape to determine successful Autoclave run. The transparent stripes on the indicating tape turn black if the autoclave reached a proper temperature for a proper time.
- The autoclave is located in Johnson Hall room 227. IsoLab office has a key.
- Select the appropriate program for your autoclaving purposes. "Liquid 60" for all liquids. "Grav 20" for petri plates and other solids.
- Liquid autoclaving: Keep caps on bottles loose, the autoclave should be set to "Liquid 60" 121 °C for 1 hour 30 minutes.
- Dry items (such as pipette tips, centrifuge tubes, used bacterial agar plates): Used bacterial agar plates should be placed in autoclave bag which can be found in the cabinets beneath the fume hoods in room 303B, the autoclave should be set to "Grav 20" 121 °C for ~45 minutes
- Sign-in on autoclave log with name, room number, budget number (06-9146), cycle used, and whether or not a test strip is present.
Making concentrated salt solution for standards
- Calculate the amount of the salt to weigh out to make 500 mL of 4 mM salt solution. Approximately 170 mg of NaNO3 salt is needed to make a final volume of 500 mL at 4 mM. Refer to BacterialDenitrifierCalculations.xlsx. You can also weigh appropriate amounts of salt to go straight to a 20 µM or 100 µM solution.
- Rinse out the plastic nalgene bottle thoroughly with 18 MΩ water.
- Use the graduated cylinder to measure out 500 mL of 18 MΩ water and pour into the thoroughly cleaned plastic nalgene bottle.
- Measure out the needed amount of salt on the scale and add it the clean nalgene bottle.
- Cap the bottle and shake until the salt has dissolved.
- Label the bottle with standard name, concentration, date created, and name of the creator.
- If the standard is not going to be put to immediate use, wrap with parafilm and store in the freezer, otherwise put in the refrigerator.
Diluting Standards
- Calculate the amount of 18 MΩ water and concentrated standard mixture you need to make the desired standard.
- ex: For 500 mL of 100 µM of desired standard:
- Use 12.5 mL of 4 mM desired standard
- Use 487.5 mL of 18 MΩ water
- (Desired Concentration / (4 mM of desired standard x 1000)) x total volume of desired standard
- For example: (100 µM / (4 mM x 1000)) x 500 mL = 12.5 mL of desired standard is needed
500 mL - 12.5 mL = 487.5 mL of 18 MΩ water is needed - Refer to BacterialDenitrifierCalculations.xlsx.
- ex: For 500 mL of 100 µM of desired standard:
- Rinse out the plastic nalgene bottle thoroughly with 18 MΩ water.
- Use the graduated cylinder to measure out the correct amount of 18 MΩ water and desired standard water and pour into the thoroughly rinsed nalgene bottles.
- Label the bottle with standard name, concentration, date created, and name of the creator.
- If the standard is not going to be put to immediate use, wrap with parafilm and store in the freezer, otherwise put in the refrigerator.
Bacterial Growth
Bacterial Strain
Our specific strain used for this method is colloquially referred to as Pseudomonas aureofaciens. It has been renamed as Pseudomonas chlororaphis subsp. aureofaciens and is purchased through ATCC with number 13985. This strain is referred to throughout the lab as "P. aur." and is the strain to use when you are interested in oxygen isotopes of nitrate due to its relative higher conservation of oxygen in nitrate. This is in contrast to "P. chl." which has been colloquially referred to as Pseudomonas chlororaphis and is now Pseudomonas chlororaphis subsp. chlororaphis. This strain can be obtained from ATCC as 9446 and is the strain that can be used if only interested in nitrogen isotopes of nitrate.
Making freeze-dried stocks from ATCC purchase
The ATCC vial is opened as per instructions that come with the strain. All materials and protocols for creating freeze dried stocks were obtained from OPS Diagnostics. While you should certainly check the OPS Diagnostics pages, in the event they become unavailable, an archive copy of protocol has been saved here so that we can reproduce these methods if needed. You can also find a copy of the overview written by OPS Diagnostics here.
Checking Bacteria Purity with Petri Plates

You can use tryptic soy agar plates to test the purity of a culture or create a pure culture.
- Conduct all work under the laminar flow hood.
- This is a basic unit that simply bathes your work area in sterile (or near sterile) air. Plug the fan in to the right of the unit to turn it on.
- Label plate with bacteria species, date, and plate #.
- Use the torch mounted in a stand to flame the loop. You will have to have the torch and stand immediately next to the laminar flow hood.
- Put a cooled flamed loop into your media bottle you wish to test and make a single strip across the top of the plate.
- Flame the loop again and streak as in Figure 1, flaming between each new streak direction.
- Wrap the plate using the parafilm.
- Incubate the plate at room temperature overnight.
- When single colonies are visible, you may wish to transfer plate to the refrigerator to slow growth.
- Three to four days after streaking plate #1, transfer a single colony by flamed loop from plate #1 to new plate and streak as in Figure 1 and label as plate #2.
- Using plate #2, repeat step 8 to make a plate #3. In this way, you are ensuring you have a pure, single strain, culture.
NOTE - IsoLab historically housed freezer stocks in a -80 °C freezer on the second floor of Johnson Hall. Early in 2016, all our freezer stocks in JHN 211 were accidentally discarded when the freezer was cleaned out. We have since been working on a way to keep cells out of -80 °C by keeping them freeze dried. So far, as of Oct 6, 2016, this has been working. I created starters and freeze dried stocks from a media bottle inoculated from the original strain obtained from ATCC. See above section for methods to create these freeze-dried stocks.
Starter Creation
We try to inoculate media bottles with a large number of viable cells by using these "starters".
- Add 20 mL of the Buffer Stock Solution into 480 mL of media. Inoculate from a single colony from plate 2 or 3 (or a freeze dried stock). If you inoculate from an existing starter or from left-overs of a harvest, make a plate from this same source so we can verify its purity. Refer to section on Inoculation of Media Bottles for inoculation steps.
- When the bottle is ready, as if it were time to harvest, distribute ~10 mL of media into 50 VWR sterilized centrifuge, conical bottom tubes.
- Label starter solution with starter label and date. Store in the fridge until needed for inoculating other media.
Inoculation of Media Bottles
- Conduct all work under the laminar flow hood.
- This is a basic unit that simply bathes your work area in sterile (or near-sterile) air. Plug the fan in to the right of the unit to turn it on.
- Add 20 mL of the Buffer Stock Solution into the 480 mL of media. Shake well.
- Remove one centrifuge starter tube from the fridge and re-suspend using the vortex.
- Once re-suspended and mixed, pour starter into 500 mL media bottle to inoculate the 480 mL of media and 20 mL Buffer Stock Solution mixed earlier.
- Label bottle(s) with species, inoculation date, and starter date.
- Cap tightly and put on orbital shaker in room 303B. Make sure the bottle is secured with a bungee cord or similar. Keep the orbital shaker set to 4 and leave it overnight.
- Bacteria are ready for harvest 1 day after inoculation. Ideally, the bacteria are harvested slightly before finishing up with all the nitrate in the media bottle. In this way, you are reasonably certain that all appropriate enzymes are active. The time until they are ready varies and is largely influenced by the number of active cells you inoculate with.
- You can coarsely test for nitrate using the fish tank test kit in the bacteria lab drawer. Nitrate will probably be 0-5 ppm, but tests so far suggest that its ok to harvest even if this test yields a concentration of 40-80 ppm nitrate. If this is not the case, leave on the orbital shaker for additional time and retest later, but more than likely, if the bottles are not ready after one day, something has gone wrong.
- If you can not harvest at this point, store the bottles in the fridge until you are ready to harvest (we have harvested after 7 days in the fridge without incident).
Harvesting Bacteria
- Conduct all work under the laminar flow hood.
- This is a basic unit that simply bathes your work area in sterile (or near-sterile) air. Plug the fan in to the right of the unit to turn it on.
- Equally distribute media to an even number of centrifuge tubes and centrifuge (18 °C, 10 min, 7500 RCF). Make certain, if you are not using all eight centrifuge vials, that you have an even number and they are filled to balance the centrifuge:
- In room 302B, sign in on the centrifuge sign-in sheet.
- Turn on the centrifuge with the switch on the right side of the unit.
- Use SS-34 rotor (use arrows to find rotor type), set "rcf" to 7500, set temperature to 18 °C, adjust time to 10 minutes. You can also use "recent" settings if this spin was used recently.
- This cycle takes 18-19 minutes to complete.
- The bacteria plug should be roughly pencil-eraser to dime-sized and pink when finished. White pellets are either the result of P. aur being at a different life stage than desirable or the presence of a different species. The pink color originates from the enzyme responsible for converting NO2 to N2O. This enzyme is red. The distinction is ambiguous if your pellet is somewhere between white and pink. If it is most certainly white, you should consider abandoning that bottle. Don't mix one bottle that has white pellets with one that has pink pellets.
- Pour supernatant back into media bottle or directly down the sink drain.
- Reconstitute the bacteria plug with "nitrate-free" media located in the denitrifier cabinet. 100 mL bottles with orange caps contain the nitrate-free media. Use an ethanol rinsed, DI water rinsed pipette tip to transfer the "nitrate-free" media.
- Add at least 4 mL of "nitrate-free" media per centrifuge tube. If you have trouble opening the nitrate-free media bottle, use leather gloves.
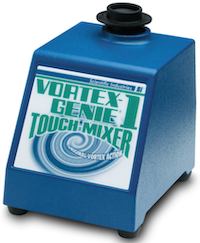
- Vortex thoroughly, with the Vortex Genie, until plug is completely dissolved.
- Add the 4 mL aliquots back into the very same 100 mL orange-capped media bottle, then add 5-10 drops of well-mixed Antifoam B (Antifoam B must be mixed thoroughly to be effective).
- Repeat steps 1-5 until all media has been harvested.
- When all bacteria have been transferred to the 100 mL "nitrate-free" orange-capped media bottle, cap it tightly and leave on the orbital shaker set to 4 for 1-2 hours.
- Using an ethanol-rinsed, DI-water-rinsed pipette tip, add 2 mL of bacteria-containing media to each of 40 sample vials.
- Crimp the aluminum seals and gray septa onto the vials with the crimper. Make sure the crimper head is tight. When crimping, you should NOT be able to squeeze both handles all the way.
- Put a long blue needle through each septum in each vial for venting. Angle the needle to keep it out of the way when inverting the vial for purging, but don't let it touch the side of the vial.
- Turn on the nitrogen cylinder. Output pressure should be 10 psi. Flow rate through each vial will be approximately 7 mL/min.
- Invert vials and push brown needle through septum. It must begin bubbling immediately. If it does not, ensure nitrogen is on, check needles for clogs. The most likely culprit is a blue needle with some liquid in it, use a syringe to blast the needle clear and try again.
- Purge for 1-2 hours (1 hour is enough, 2 hours is safe, 3-4 hours is excessive but really makes the blanks super tiny).
- Record details in the Bacteria Notebook (or personal notebook):
- At a minimum, record the date of harvest, who is harvesting, the samples to be run, plate dates, inoculation dates, media preparation dates, refrigeration of inoculated media dates (if applicable), bacteria pellet size and color, nitrogen pressure used on the manifold, start and end shaker and purge times. Include any other information you feel is necessary.
- At this point, if you are sample-limited, you may choose to test the current harvest by running a blank and a standard:
- Remove two vials from purge rack after they are sufficiently purged. Immediately remove blue needle and discard into red sharps bin.
- The first vial will be a blank and you do not need to do any more to this vial. The second vial will be USGS35.
- Inject 1 mL of 100 µM USGS35 into this second vial. Wait for approximately 30 minutes. Proceed to "Isotope Analysis on Brave Irene" section, to run these two vials.
- Based on the results of these two vials, you may choose to continue injecting sample and standard material into the remaining 38 vials. If the blank is sufficiently small and the USGS35 sufficiently large with a D17O > 19 permil, it is ok to proceed injecting samples.
- When sufficient time has passed, remove each vial from the purging needle, immediately followed by removing the blue needle. If you poke yourself with a needle immediately wipe the punctured area with Iodine wipes found in the First Aid Kits. Blue needles are discarded into the red sharps container.
- Label vials 1-40 on the bottom with sharpie.
- Add designated sample to each vial, taking care to rinse syringe and needle thoroughly with 18 MΩ water between each sample:
- Using three beakers of 18 MΩ, rinse syringes 3 times into a waste beaker and 1 full mL through needle. NEVER touch needle to sample. Always pull up sample and 18 MΩ with syringe only.
- Vent vial if injecting more than 8 mL of total liquid by using a brown needle as a vent.
- The maximum sample volume that can be injected into a vial is 13 mL (total volume then is 15 mL = sample + media).
- Calculate the injection amount based on the known NO3- concentration. Use BacterialDenitrifierCalculations.xlsx if you would like help or an example calculation.
- The Target NO3 amount for N2O method is 20 nmoles
- The Target NO3 amount for O2 N2 method is 100 nmoles (350 nmoles is maximum)
- If you are not sample-limited, you may choose to rinse the needle and syringe with ~1 mL of sample before injecting each sample into their vial. In this way, you are rinsing the syringe with the upcoming sample after it has already been thoroughly cleaned with 18 MΩ water. This may be overkill, but may also provide a warm fuzzy feeling.
- Put sample vials in bacterial sample vial rack and place on orbital shaker set to 4 and leave overnight.
Cleanup and Waste Disposal
- Supernatant waste media from harvest - This is the media you discard after a centrifuge run. You may dump this media down the drain provided you do this soon after harvesting. If you waited overnight or longer, this media must be autoclaved. See Autoclaving section. Once the liquid is cool enough to handle, pour the, now sterile media, down the drain.
- Centrifuge tubes - Rinse caps and centrifuge tubes with alcohol. Rinse caps and vials 3x with DI water. Invert tubes in rack. Rinse rack with DI water. Place caps upside down on rack. Place rack with tubes and caps in clean-dish hood to dry overnight.
- Syringe Needles - All syringe needles go in the red plastic sharps container.
- Sample vial media with NaOH - This media, while sterile (because of the NaOH) is very basic and must be neutralized. Use the crimp cap removal tool to pull off the caps. Discard the caps into the trash and pour the media into a 1 L glass media bottle which needs to be labeled "High pH Waste". When this bottle is full, neutralize the liquid with Hydrochloric acid (HCl) waste (this is a 10-20% HCl solution that has previously been used to acidify soil or rock samples). Use pH paper to verify it is neutral. If you overshoot and make it acidic, use the carbonate that is in the hood to bring it back to neutral. Pour the neutral pH liquid down the drain and flush with water. Enter the appropriate information into the drain log.
- Waste solids and plates - Place solid waste materials (e.g. petri plates but NOT NEEDLES) into an autoclave bag with indicator tape and autoclave . Once the bag is cool enough to handle, put it in the garbage.
- Used pipette tips - The pipette tips are reusable and are autoclaved with waste solids under "Grav 20" cycle and put on shelf for reuse. You can also successfully put the container in with a liquid 60 cycle if you have space. Use autoclave tape on the outside of the tip box.
- All glassware - Wash all glassware as per the Cleaning Laboratory Glassware method.
Troubleshooting
- White bacterial pellets
- Something is contaminated and overcrowding the P. aur.
- Start making plates to track where the contaminant is originating.
- Inoculate again to make sure the current harvest was not a fluke.
- Plating
- If the plates are growing as lawns instead of streaks, the agar is too diluted. Either there is too much water or not enough Tryptic Soy Agar in the solution.
Archived Methods
Here are links to historical version of the bacterial denitrifier method:
- BacteriaJobs_fromJulia_080506.pdf
- BacterialStrainPreservation_100330.pdf
- BacterialDenitrifierMethod-IsoLab_160520.pdf
Suggested Reading
- Casciotti KL, Sigman DM, Hastings M, Böhlke JK, Hilkert A. (2002) Measurement of the Oxygen Isotopic Composition of Nitrate in Seawater and Freshwater Using the Denitrifier Method. Analytical Chemistry 74, 19. doi: 10.1021/ac020113w
- Kaiser J, Hastings M, Houlton BZ, Röckmann T, Sigman DM. (2007) Triple oxygen Isotope Analysis of Nitrate using the Denitrifier Method and Thermal Decomposition of N2O. Analytical Chemistry 79, 2. doi: 10.1021/ac061022s
- McIlvin MR, Casciotti KL. (2011) Technical Updates to the Bacterial Method for Nitrate Isotopic Analyses. Analytical Chemistry 83. doi: 10.1021/ac1028984
- Sigman DM, Casciotti KL, Andreani M, Barford C, Galanter M, Böhlke JK. (2001) A Bacterial Method for the Nitrogen Isotopic Analysis of Nitrate in Seawater and Freshwater. Analytical Chemistry 73, 17. doi: 10.1021/ac010088e