Cleaning carbonate samples with H2O2
Introduction
This method was adapted to IsoLab after carbonate samples for clumped isotope analyses showed high sulfur content, which impacted both the prep line and D47 measurements. The high sulfur content us typically caught by observing an anomalously high D48. Use of hydrogen peroxide to remove sulfur from carbonate samples is a common method in the literature. We tested this method on several replicates of our in-house standard C64, and there was no significant change in D47 between treated and untreated C64. If you suspect your samples have high sulfur content, this treatment process might help. This method is a copy-and-paste with html formatting added from Emma Heitmann's method.
READ THIS BEFORE STARTING METHOD:
You must know the percent carbonate of your samples and how much sample material you need before beginning this process. Check to percent carbonate methods if you would like to measure it before proceeding.
The mass and percent carbonate will likely change with the treatment process, but you can use the mass before and after treatment and the percent carbonate before treatment to calculate the new percent carbonate.
To save you time, it is recommended that you treat more than enough sample material for your target number of replicates so that you do not have to repeat this treatment process later.
This method requires 4 consecutive days of coming into the lab to treat samples (24hr treatment period), plus a week (give or take) to dry samples. You probably want to plan to start the treatment on a Monday or Tuesday, and at a time you can come in consistently each day. It will be 1-2weeks from the start of the method before samples are ready to run through the polly prep line.
It is recommended that for each step, you start with our C64 standard.
Safety
Risksassociated with this method include: hydrogen peroxide (H2O2) and potential high pressure.
You will be using 30% H2O2 which can be quite reactive depending on your sample composition. Read and understand the H2O2 SOP and SDS. Wear a lab coat, eye protection, and nitrile gloves. Unless you are centrifuging or placing in the oven, sample vials containing H2O2 should be in the fume hood. Lastly, waste containers should be allowed to vent so as not to build up pressure and explode.
Exhaustive Protocol

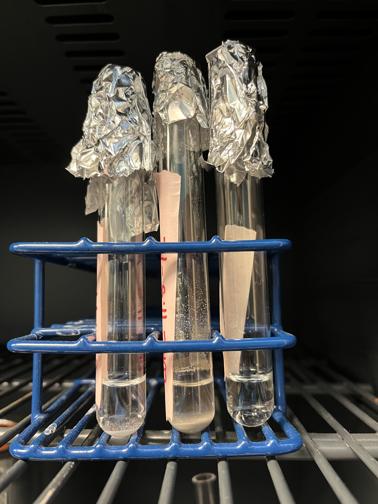
1. Prepare sample vials - Obtain glass vials (one per sample, and one standard C64), cover with tin foil lids to protect from contamination, and label with tape and sharpie.
2. Load your sample powders - Use the scale in the prep lab using weigh paper or whatever your preferred method (target mass determined by percent carbonate and target number of analyses), then carefully transfer sample to vial, cover with foil cap.
3. Prepare the H2O2 solution - If the bottle of H2O2 is 30%, dilute the H2O2 solution to 1-3% H2O2. For example, to dilute to 3% use a graduated cylinder to measure 10 mL of 30% H2O2 solution, then add 90 mL 18 MΩ water until you have 100 mL total solution. You can scale this ratio to have as much solution as you need for your samples (200 - 50 0mL recommended). Pour this solution into a clean squirt bottle (found on clean ware shelf in prep lab) and label it.
4. React samples with H2O2 solution - Bring samples and solution squirt bottle to prep lab fume hood. Uncover the C64 standard, and carefully add H2O2 solution until the sample is completely submerged. Shake the vial so that the sample and solution are well-mixed, and then recover with foil cap. Repeat with all samples. VERY IMPORTANT: The solution level should be equivalent in each vial, which is important for weight balance in the centrifuge step.

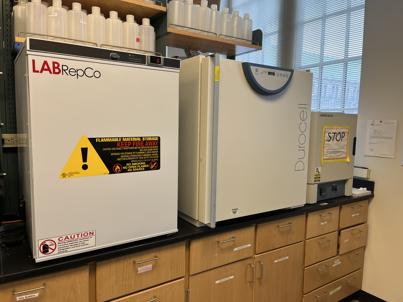
5. Let samples react for 24 hours - Place samples in the phosphoric acid 60°C oven, located across from the fumehood and set to 60°C. Leave for ~24 hours.


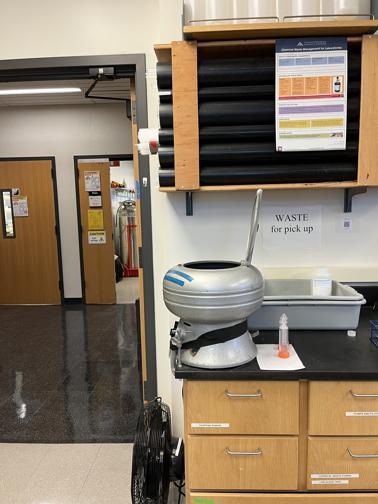
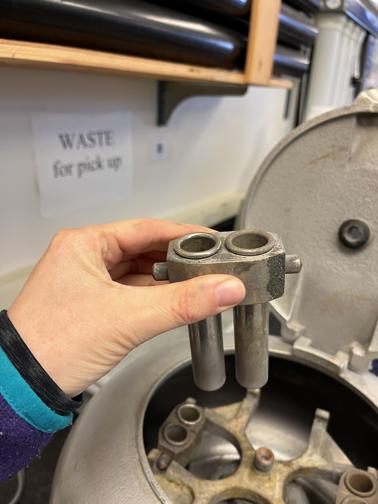
6. Centrifuge samples - (link method?) Remove samples from oven and bring them to the centrifuge. Make sure that the small vial attachments are in place – if not, they can be found in the drawer next to the centrifuge and it is easy to install them. The vial holders are sometimes dirty, so clean them out before use. Vials can sometimes get stuck or break in the centrifuge. To prevent this, wrap vials in a chem wipe before inserting into metal test tube holder. VERY IMPORTANT: weight must be equally distributed in the centrifuge. Remove foil caps, load samples so weight is evenly distributed, close lid, set speed to max? and the timer to 20 minutes. Stay and wait for 30 seconds with your hand on the lid to make sure the centrifuge is well-balanced and operating smoothly. If not, stop centrifuge and inspect samples.
7. Decant supernatant - Take samples back to fumehood. Find a Nalgene bottle and label it “H2O2 Sediment Waste.” Carefully decant solution into the waste container (i.e., carefully pour out solution without losing solid sample material, it’s okay if there is a little solution left in the vial).
Repeat steps 4-7 two more times.
8. Rinse samples with DI water - Rinse samples with DI water 3 times. To do this, follow steps 4, 6, and 7 with 18 MΩ water instead of H2O2 (and skipping the 24 hour reaction step).
9. Dry samples - Leave samples to dry in oven with foil caps removed. This can take a week, give or take.
Troubleshooting
Suggested Reading
- Yue J, Xiao J, Wang X, Fan J, Qin B. (2021). Clumped isotope analysis of lacustrine endogenic carbonates and implications for paleo-temperature reconstruction: A case study from Dali Lake. Science China Earth Science 64, 294–306. doi: 10.1007/s11430-020-9697-9
