
Cleaning Laboratory Glassware
Introduction
This document describes how to clean all sample preparation glass and plastic ware.
Safety
Risks associated with cleaning glassware include strong soap, broken glass, acidic pHs, and high temperatures.
You will be using a strong soap (micro-90) that can dry out your hands; gloves are recommended. A lab coat will help protect your clothing from the soap and any greasy slime or other unsavory bits.
If you have not broken a beaker while washing dishes, you will. Be careful not to cut yourself. Broken glass goes into the broken-glass box in 303B.
You may also be using a low concentration HCl bath. Wear gloves with a long enough cuff to prevent the acid making its way onto your skin. Wear a lab coat as well. The biggest risk when using an HCl bath is making it with concentrated HCl. Protect yourself against severe burns from direct contact or fumes by wearing thick gloves, lab coat, and working in a fume hood.
When using the muffle furnace, wear protective gloves if the glass is still warm. If you must remove items while hot, protect against burns and make sure you have a safe location to place your pieces.
You are expected to have read the muffle furnace SOP. You may also choose to acid wash your glassware, in which case you should read the hydrochloric acid SOP.
Terse Procedure
- Wash dishes with soap and water
- All debris, oils, labeling tape, sharpie labels, and sharp objects should be gone
- Rinse with tap water
- (Soak in acid bath if you choose to)
- Rinse with DI water
- Dry in hood
- Wrap or top with foil as appropriate
- Bake in muffle as appropriate
- Return clean dishes to appropriate location
Cleaning Glassware
- Don glovesNitrile gloves are located on the north wall shelves in 303B closest to the windows and microbalances.
- Remove any tape or foreign matter from the glassware and rinse if needed.
- Place glassware in a tub of Micro-90soapy water. Difficult-to-clean glassware may need overnight soaking and if soaking, ensure the entire piece is covered with soapy water. Choosing to soak or not will depend on how much time you have to spend doing dishes and how quickly you need the dishes clean. If soaking, ensure the entire piece is covered with soapy water. If not soaking, or when finished soaking, proceed to next steps.
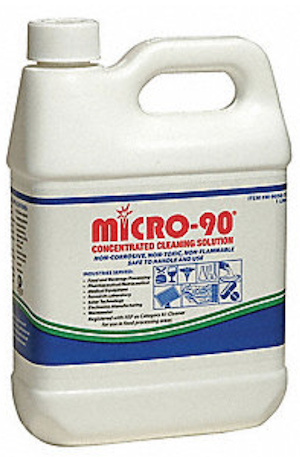 Micro-90 is a concentrated soap and is located under the sink of room 303B closest to the office (the northernmost sink). If the 4 L plastic container is not there, look for a new container on the top central shelf above all other reagents in 303B on the north wall (storage shelf #6).
 - Scrub as needed the inside and outside of glassware with brush or sponge.
- Rinse thoroughly with tap water.
- If you are going to acid wash your glassware, make an acid bath and soak your glassware overnight or as long as you want. We do not routinely acid wash so don't assume "clean" glassware have been treated as such.
- Rinse well with deionized (DI) water.
- Place glassware on drying paper in the gray bin located in the fume hood, and allow to completely dry.
- Once dry, cover with foil and bake in muffle furnace at 500 °C. Make sure to read the muffle furnace SOP and fill out the sign-in sheet. Do not bake laser vials with inserts.
- Once dry or baked in muffle furnace, return glassware to the appropriate storage location.
Cleaning water laser vials
The laser vials with 300 µL inserts can not be cleaned in the normal way. The air space between the insert and the vial wall keeps the vial afloat. If the insert appears to have salts or otherwise look dirty, use these steps to attempt a cleaning.
- Start by placing dirty vials into a blue tray as if the vials had sample water in them.
- Pipette DI water into each vial, making sure air bubbles are removed from bottom of vial insert.
- Cover with vials with glass plate and allow them to soak like this overnight.
- Fling DI water into sink.
- Attach glass pipette flexible hose piece to DI water spigot.
- Turn DI water on only slightly and rinse each vial insert thoroughly.
- Allow vials and tray to dry in drying oven overnight.
- Inspect inserts and ensure they are clean. If not, repeat or discard into broken glass.
Cleaning Psi vials
- With liquid protective gloves on, remove vials from Psi and place in the #1 white tub. The vials can contain acid, sediment, carbonate, and bubble bursters. That is, just set them in the tub regardless of what is inside them. We use the acid to our advantage later.
- Fill tub half ish full with DI water.
- Remove all air from each and every single vial. YES ALL OF THE AIR. The vials must soak in this acidic environment. If you want to be certain that no carbonate is left inside any vial, this step is absolutely critical. Allow them to soak overnight.
- Remove each vial and shake all of the liquid out of the vial back into the tub, NOT THE SINK. Place each vial in the #2 white tub. Fill the #2 white tub half ish full with DI water and, again, jostle air from every single vial. Soak overnight.
- Add sodium bicarbonate (baking soda) to the #1 tub while the tub is in the sink. Use the wooden dowel to stir. Add more sodium bicarbonate and stir until it stops fizzing and you see a near neutral pH as measured with pH paper. Then, after you have achieved neutral pH, dump the contents of the #1 white tub down the drain. Left over baking soda is okay. Rinse the #1 tub with DI water and leave on the bench.
- Shake all of the DI water out of the vials that were soaking in the #2 white tub and place them into the #3 white tub. Fill the #3 white tub half full with DI water and shake all of the air out of each vial. Soak overnight.
- Dump the water remaining in the #2 tub down the drain.
- Shake all of the water out of each vial and place them into a clean glass beaker. Place this beaker into the 60*C drying oven near the hood. Make sure the drying oven door closes. You must move the handle to the side to open AND CLOSE this oven. Leave these vials at least overnight or until they are dry.
- Dump the water from #3 tub down the drain.
Cleaning Bacterial Denitrifier Sample Vials
The bacterial denitrifier method sample vials require a special cleaning method because of the oil used to lubricate the septum on the autosampler.
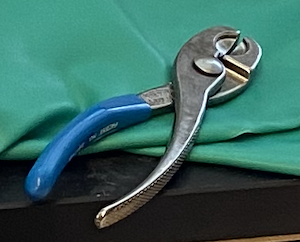
- Wear thick protective glovesYou can try using leather gloves under nitrile gloves. Leather gloves are located in the garage (302C) and nitrile gloves are on the north wall shelves near the window and microbalances. You can also try using the thicker gloves located in the HF lab (302B) located on the north wall shelves. Do not use the autoclave gloves that are stored in the same drawer as the cap removal tool.that will withstand broken glass abrasion. Remove the crimped aluminum ring using theremoval toolThe removal tool is located in the denitrifier supplies drawer on the east wall under the laminar flow hood / box.. Empty vial contents into "high-pH waste" container. If the glass vial breaks, place glass pieces in broken glass container after emptying liquid into high-pH waste container.
- Cover the bottom of a red dish tub with 100% Micro-90 and cover vials with hot water.
- Completely submerge empty vials, make sure most air is out of each vial and soak for 10-20 minutes.
- Transfer, and completely submerge the vials into the second red dish tub of soapy water.
- Clean the inside/outside of the glassware thoroughly with a brush/sponge.
- Rinse vials thoroughly and feel with bare hands for grease. If grease is still present, rewash the vials. If they feel clean, continue with step 4 of the Cleaning Glassware procedure. When you are at the muffle furnace stage, wrap 20-30 vials with foil into a brick shape and then place them in the furnace.
Cleaning Plasticware
- Follow glassware steps 1-6.
- DO NOT PUT PLASTIC IN THE MUFFLE OVEN.
- Once dried in the fume hood overnight, return plasticware to the appropriate storage location.
Make a 0.5 M hydrochloric acid bath (~ 1% HCl by weight)
You are expected to have read our Hydrochloric acid chemical SOP.
Remember: Always add acid to water.
- Add 4 L of DI water to the bath. You may also choose to create a smaller bath. Adjust volumes accordingly.
- Add 165 mL of 12 M HCl (37% by weight)
- Should the acid bath become discolored or contaminated in any way, put acid in a plastic bottle, label it and store it as waste in the Waste Pickup Area.
Waste
If you are changing out the acid bath, the old hydrochloric acid must be put into containers (preferably plastic) and taken by EH&S. You must wear the long thick protective gloves, eye protection, a lab coat, closed-toed shoes, and pants to do this. In a gray bin that is on the floor immediately below the acid bath hood, place a large plastic container with a funnel. Carefully remove the acid bath from the hood and begin pouring the acid into the container. Don't overfill the waste container (leave a few inches from the absolute top). Use more containers until all acid is removed. Rinse the acid bath container once with DI water and pour this waste into the same waste containers. Label the waste containers appropriately.
Broken Glass or Plastic
If you break any glassware or plasticware during this procedure, make certain all broken pieces are put into the broken glass box located in room 303B under the lab bench near the northernmost sink.