
CRDS Water Isotope Analysis - δD δ17O δ18O
EXPIRED - USE the generalized CRDS procedure.
Introduction
Here is a working version of how we are currently running the Picarro L2140i (aka Phoenix).
Safety
Users should be careful with syringe needles and vials. If either of these items are no longer useful (i.e. broken), they must be discarded into the broken glass container. The vaporizer is 110 *C and the septum nut can be hot to the touch.
Terse Procedure
- Clean up previous run – close Coordinator, empty the existing tray, throw caps in trash, discard water down sink, vials go in beaker in drying oven.
- Load new waters - load 200 uL of water into 300 uL fused insert vials.
- Take notes - write the tray description and any other notes in the notebook while loading waters into vials.
- Prepare autosampler - put vials in tray, clean syringe, modify job, don’t change the septum yet.
- Start run – open Coordinator Launcher, select O17 High Precision, start autosampler, click 'Change Septum', wait for first injection to complete.
- Take more notes – write down time and date of run start, what you did with the syringe, septum etc.
- Change septum – swap out vaporizer septum when Coordinator indicates the first injection is complete, press “Septum Changed” when done.
- File management – create directory on S drive within “S:\Data\projects\picador\data\151026_present_HKDS2171_v5\” naming it with the start date of the run (yymmdd) and then something descriptive (e.g. 140522_IsoLabStandards).
- Tray description – create a tray description file in a newly created folder, use a text editor, save as yymmdd_TrayDescription.csv, make copy as .txt.
- Data - use Matlab and phoenixh5, phoenixdrift, phoenixcalibrate, phoenixcompile.
Exhaustive Protocol
Clean up previous run
You will know the previous run is complete if you see a screen of dots in the Coordinator log window, and the autosampler is no longer moving. Close the Coordinator...be patient, it will close eventually. Remove vials from the previous run and take them to the wet lab. Open each vial, throw caps in trash, and discard the water down the sink. If the vials contained dirty or salty samples, they must be soaked in DI water. You will likely have to pipette DI water into each vial. Once vials are clean, gently place vials in beaker and put them into the drying oven.

Load new waters
Load 200 µL of water into 300 µL fused insert vials. Use the pipette, pipette tips, and trays in 303B drawers labeled ‘Laser’. Vials are located on the lab bench above these drawers. Should you wish to load 1 mL of water, old vials are located in a drawer labeled ‘Laser – extras’. Use one full tray of dry clean pipette tips and also have one empty pipette tray available. For each distinct water, use a clean dry pipette tip, discarding the wet tips into the tray that started out empty. In this way, you will have one pipette tip tray with dry clean tips and one tray to receive the wet tips. If the pipette itself becomes wet, either on the inside or outside, ensure it is dry before proceeding. Use wipes or paper towels and / or compressed air to dry it out. Make sure the caps are just tight enough but not too tight. If the cap septum is overly concave, it is too tight. Put all standard waters and all sample waters back in the refrigerator when loading is complete. Put the wet pipette tip tray in the drying oven. As you are loading waters, write the water type or sample ID in the notebook.
Take notes
Write the tray description and any other notes in the notebook (Picarro – 17O HKDS 2171) while loading waters into vials.
Prepare autosampler
Place tray onto tray-holder or transfer vials from the tray(s) you loaded into. The large metal tray used on Phoenix is typically left in place while you load into the typical light blue plastic trays. Visually check the caps one last time; no cap should be overly concave.

Clean the syringe. Press “Menu” (F1), on autosampler controller, select "Change Syr" (also F1) (NOT "Clean Syr" - this is an automated method that we do not use). Remove the syringe from the autosampler by unscrewing the top red nut holding the plunger in place and by rotating the black syringe-body lock to a vertical position. Find the syringe cleaning kit. Fill the 'helper' syringe that is in the kit (not the one you just removed) with the 1% HCl solution and set aside. Place the syringe you just removed from the autosampler into the HCl solution and pull the plunger up half way or as far as you can. Use the 'helper' syringe and apply HCl to the top of the autosampler syringe (e.g. where the plunger meets the syringe glass body). Set the helper syringe aside. Continue moving the autosampler syringe up and down while it is in the HCl solution until plunger can be removed from syringe body (this usually takes a while and you must be patient and gentle). Wipe off plunger with a wipe. Reinsert the plunger into the body and continue moving the plunger up and down while still in the HCl. Remove the plunger again and wipe it off. Inject all HCl back into HCl container. Fill the autosampler syringe with DI water by pulling plunger all the way to the top. Release this water into a wipe, and repeat ~5 times. Rinse heavily with the same DI while keeping syringe tip in the DI water. Reinsert the, now clean, syringe into the autosampler and indicate complete on autosampler controller by clicking "continue". Rinse the 'helper' syringe with DI water in the same way. If you can’t remove the plunger during cleaning or break it or it was already broken, obtain a new 10 uL syringe from the drawer in the north east corner of 302A. Discard the old syringe to the broken glass box in 303B.
Daily Log
The lab uses a daily log for each instrument or preparation line to allow users a first glance at the readiness of the instrument. By comparing the current state of the instrument to historical states, you are more informed about the instrument and whether or not it is functioning properly and ready to run your samples.
Each daily log is web based and browser accessible. No link is provided here by design. Open the browser on the controlling computer and you should see at least two tabs already open. One tab is this SOP and the other is the daily log. If the browser has more than two tabs open, it may have additional SOPs. Use the bookmark toolbar as needed if tabs have been closed.
Work through each cell of the daily log. If you are uncertain where to find certain information, hover over the column header tip, denoted by a ⓘ symbol.
Make certain to press the 'save to log' button when you are finished entering data.
You are welcome to make notes if you have observed something with or done something to the instrument and would like to document that information. Use the "insert note" link at the top of the daily log to make a note. You may enter notes at any time.
Start the run
Open the Coordinator Launcher from the desktop and select O17 High Precision. Start the Autosampler by pressing F4 from Home screen. You will need to indicate the job(s) to be run. If you are running all vials identically, it is probably just the "Selected" option but if you are running something more complicated, it is probably the "All" option. Cycle through these options by turning the autosampler wheel. Now go back to the Coordinator window and click 'Change Septum' in the upper right corner of the Coordinator window (you must wait for first injection to complete and for the Coordinator window to indicate it is time to change the septum). Continue with these instructions in the meantime.
Take more notes
Write down the time and date of run start. This is essential as files are named within the instrument based on time. Also write down what you did with the syringe, the septum, etc.
Tray Description
Type in the tray description on the Phoenix computer. Use C:\Phoenix\TrayDescriptions\_empty_TrayDescription.txt and save it as yymmdd_TrayDescription.txt, where yymmdd is the start date of the run.
Change Vaporizer Septum
After the first injection is complete the Coordinator will indicate when it is appropriate to change the septum. Remove the magnetic cover and use the slotted wrench side of this cover to loosen the nut. Remove the nut with your fingers taking care as it is hot. The septum should be stuck inside the nut. Use the large-gauge needle that is in the syringe cleaning kit to extract the septum. Discard the old septum into the trash. Place the new septum into Swage-lok nut using the blunt end of large-gauge needle. Place the nut back onto the vaporizer taking care not the allow the septum to fall out when you turn the nut over. Hand tighten the nut; you should feel the nut bottom out. Press 'Septum Changed' which is the same button you pushed to begin changing septum in the Coordinator window.
Cleanup
Vials
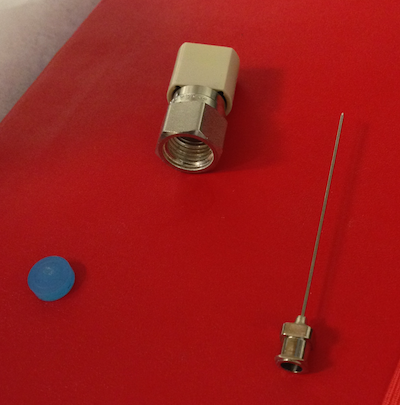
Take vials with previously analyzed water to the wet lab. Open each vial, discard the caps into the trash, and discard the water down the sink by gently shaking the vials. If the vials contained dirty or salty samples, they must be soaked in DI water. You will have to pipette DI water into each vial. You may also use the vial-cleaning-hose-pipette-contraption as shown in image. Once vials are clean, gently place vials in beaker and put them into the drying oven. If soaking in DI water does not get the vial inserts clean, use the glass pipette rubber hose tool attached to a DI water spout to force DI water into the bottom of the insert.
Vaporizer Cleaning
This procedure is completed irregularly depending on the memory or carry-over from sample to sample. More salt buildup inside the vaporizer will leak to more carry-over from previous samples. Picarro wrote up a procedure for this. A pdf of this procedure is located under Resources in Manuals. We have slightly different parts to assemble the apparatus but the general workflow is the same. Also, consider using 5-10% acetic acid as the first rinse of the vaporizer. Follow this by numerous rinses with 18 MΩ water.
File management
Create a directory on S drive within “S:\Data\projects\picador\data\151026_present_HKDS2171_v5\runs\” naming it with the start date of the run (yymmdd) and then something descriptive (e.g. 140522_IsoLabStandards). Create a "raw" folder within the folder you just created. You should also copy the tray description into this dated folder.
Data
Data files
Copy previous run data to S drive (zip files containing .h5 files, tray description, Coordinator data) into directory for this run
- Phoenix h5 data location “C:\Picarro\G2000\Log\Archive\DataLog_Private\” then select date
- the location for the zip file that is currently being created is "C:\Picarro\G2000\Log\Archive\DataLog_Private.zip"
- Phoenix tray description location: C:\Phoenix\TrayDescriptions\
- Phoenix coordinator data location: C:\IsotopeData
Matlab
phoenixh5.m - The phoenixh5.m script (1) defines the run, (2) finds all the injections, (3) creates injection level data by summarizing (mean, standard deviation, etc.) the high resolution data within each injection or pulse, and (4) creates vial level data by summarizing all injection level data for all injections in each vial. While you may wish to go back and do more diagnostic analyses with the high resolution data or the injection level data, it is the vial level data that most will be interested in. Make sure you have all files copied from the phoenix computer to the data server. After starting the script and selecting the main run folder (e.g. 150114_BradSnowpitA2), all files will be unzipped and then all h5 files will be loaded (this takes several minutes). Matlab then generates a figure to determine the start and end point of the run using water concentration data. Zoom in on the graph and arbitrarily select points about an injection width left of the first injection and right of the last injection. Enter start and end point at the prompt (e.g. 10900,649000). The script will then finish on its own. Created files are *_StartStop.mat, *_h5.mat, *_inj.mat, *_vial.mat, where * is the date in yymmdd format. You can plot the injection level H2O concentration data, for example, by plot(inj.h2om, ‘.’ ), where m is mean. H2O concentration should be very near 20,000 ppm. You can also look over d18O or dD by plot(inj.d18Om, ‘.’ ). If you see points at the end of the run that are exactly zero, not all of the peaks have been identified or some error has occurred with the anticipated number of peaks.
phoenixdrift.m - The phoenixdrift.m script is used to check for drift in vial level data over the course of the run. This script uses the _vial.mat file that was created using phoenixh5.m. Run phoenixdrift and select the *_vial.mat file that was created in the folder you are currently working in. You will need to tell the script what standards you want to use to drift correct. These are very likely the same standards you will use to calibrate. A file *_vial_drift_corr.mat was created into the S:\Data\projects\phoenix\driftcorrected\ folder.
phoenixcalibrate.m - The phoenixcalibrate.m script calibrates all vial level data to the standards included in your run. This can be done on a single run (drift corrected or not) or can be done with many runs. Make sure you have all the *_vial_drift_corr.mat files you want in a single folder before you start this script. A calibrated data file is created and placed into S:\Data\projects\phoenix\calibrated\.
phoenixcompile.m - Finally, all calibrated data for a project can be loaded for plotting, summarizing, etc. using phoenixcompile.m. This script will load all calibrated .mat files from the folder you select and then create an exported summary file in S:\Data\projects\phoenix\calibratedexports.