Making Tubes
Introduction
This document describes how to make tubes for use in carbonate clumped isotope preparation. Making tubes involves melting pyrex, which softens at >800 C, so care must be taken to avoid burns. Additionally, properly sealing tubes is essential for carbonate clumped isotope preparation, as an improperly sealed tube would allow sample gas to escape and atmospheric gas to enter the tube.
Safety
Risks associated with this method include hot temperatures, bright light, and broken glass.
You can very easily burn yourself with the flame, the torch tip, or the hot pyrex or quartz. Wear gloves as appropriate but more importantly, be mindful of where the hot parts are.
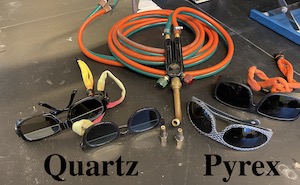
Molten pyrex and quartz are very bright and emit infrared and ultraviolet radiation. You must wear protective eyewear appropriate for pyrex or quartz, depending on the type you are working with. Failure to do so can result in permanent vision damage.
You will be working with sharp edges of glass, and potentially broken glass. Be aware of these edges so as not to cut yourself.
Exhaustive Protocol 
Getting Started 
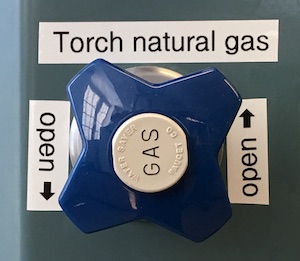
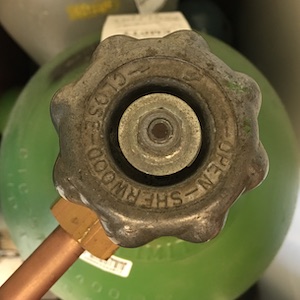
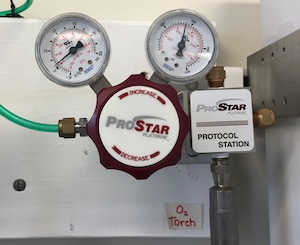
Begin by turning on the natural gas and the oxygen cylinder (see images). The natural gas knob is located on the eastern fume hood, and the oxygen cylinder is located on the south wall. Turn the oxygen on by rotating the cylinder valve counter clockwise (if looking down on the handle). Give it four or five good turns. Do NOT adjust the regulator valve mounted on the wall.
The long sticks of glass we use to make tubes are located adjacent to the door in 303B, on the western wall. The most commonly used stick is the 6mm pyrex tube, which is used for the Polly Prep Line. Other sticks you may be making tubes from are 6 mm quartz, 1/4" quartz, or 1/4" pyrex. The quartz tubes are used for heated gases and the 1/4" pyrex may be used for equilibrating CO2 and H2O.
When making tubes, make sure to wear glass blowing goggles, which are located in the ‘Glass Blowing’ drawer beneath the Polly Prep Line in room 303B.
Lay down tubes on the counter behind the prep line, lining them up with the tick marks. Make a mark in sharpie at each tick mark. Using the scoring tool, score the tube along the mark. Once scored, break the tube along the scratch. If using method 1, score and break the tube on every mark. If using method 2, score and break the tube on every other mark.
Pyrex vs Quartz
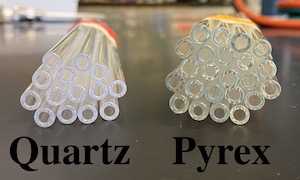
Sealing Pyrex Tubes 
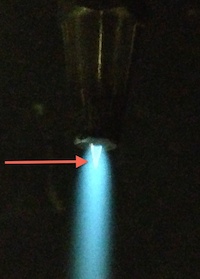
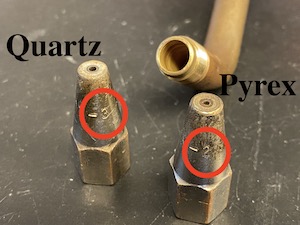
Put your pyrex glass-blowing glasses on. Turn on the natural gas by turning the red knob on the torch a quarter turn to the right. Using a striker, ignite the natural gas. Then, turn on the oxygen by turning the green knob to the left until a tight blue cone forms (see image).
Method 1:Put one end of the tume into the cone of the flame, waiting for the tube to close in. Once fully closed, press the melted end into a scrap piece of tube and pull away about an inch Then, wait for it to cool. Once cool, put the tube in flame again to detach from the scrap piece of tube. Finally, polish the sharp edges of the open end of the tube by rotating in the flame, away from the cone.
Method 2:Put the middle of the tube (with the tick mark) into the flame and wait for it to melt. Once melted, pull the two ends away from each other, making 2 individual tubes. Polish the sharp edges of the open side of each tube by rotating in the flame, away from the cone.
Set aside the sealed tubes on the white block of chalk to cool. Do NOT touch the end of the tube until fully cool.
Sealing Quartz Tubes
Use Method 2 above. Wear nitrile gloves when handling the quartz. This is not to protect you but rather to protect the quartz from your sweaty hands.
Inspecting the Tubes 
Once cool, use a hand lens (located in the tube making station) to inspect the sealed side of each tube. An unsealed tube will have a small spike connecting the inside of the tube to the outside. As long as the spike does not extend to the outside of the tube, the tube is sealed.
Any tube that is not sealed needs to have the end resealed with the torch, then needs to be inspected again once cool. If you are unsure if the tube is properly sealed, it is best to reseal.
Finishing Up 
Once cooled, place 6mm pyrex tubes in the drying oven located on the north counter of 303B. Other tubes should be put in the proper location in the clumped sample glass tubes drawer, located beneath the Polly Prep Line counter.
If you have made quartz tubes, place them in a large crucible upside down and put crucible in muffle oven. Set muffle oven to 1100 °C and let them bake overnight.
If you are the last to use the torch, make sure to turn the natural gas and the oxygen OFF.
Troubleshooting
- Make sure both the natural gas and the oxygen are turned ON.
- Make sure the torch control knobs are not open too much - a quarter turn of natural gas is sufficient to light the torch.
- If the oxygen cylinder is indeed ON and the right pressure gauge is reading zero psi, you are out of O2 and a new O2 cylinder is needed.
