Freeze Dryer
Introduction
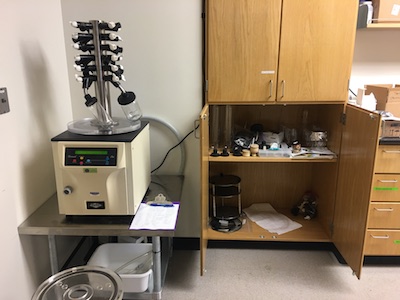
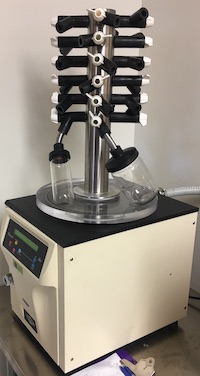
The freeze dryer, or lyophilizer, is a quick and efficient way to dry samples. It is located in 302B. Through sublimation and low vapor pressure, water is extracted from samples and frozen on the condenser. Samples are frozen, not by actively freezing as in a freezer, but by energy loss through sublimation. Our freeze dryer is a Virtis BT4KXL-75 with a Leybold Trivac D2.5E vacuum pump.
Safety
Risks associated with this method include vacuum, cold temperatures, and heavy objects.
If you are working with the freeze dryer and using glass vessels, consider it an implosion hazard and don safety glasses.
The drum inside the freeze dryer can be as low as -80 °C and should be considered a frost bite hazard. Wear protective gloves if you will be working with the drum.
The main compartment housing the sample shelf is heavy and awkward. Take appropriate precautions so as to lift properly and so as to prevent dropping the piece.
Terse Procedure
- Turn the power switch on.
- Drain previously condensed water.
- Turn on the condenser.
- Make sure your samples are frozen.
- Choose from the drum with shelves or tree with vessels.
- Load frozen samples onto shelves or into glass vessels.
- If using shelves, put large acrylic cover (drum) over samples.
- When the condenser is below -40 °C, turn on vacuum.
- Write name, date, contents, expected completion date on sign-in sheet.
Exhaustive Protocol
Prepare the Freeze Dryer
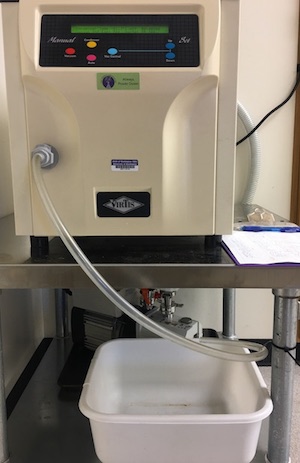
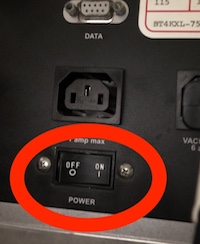
The condenser should be dry and free of water (liquid or solid) before starting a new session. If the condenser has liquid water in it, see clean up section below. With a dry condenser basin and the drain hose removed, make sure the unit has power (power switch on back) and turn on the condenser by pressing the 'condenser' button.
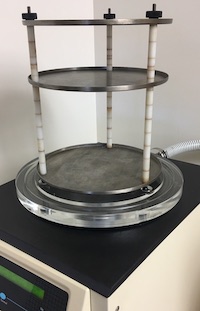
While you are waiting for the temperature to drop below -40 °C, decide if you are using the drum or the tree. Look in the cabinet shown in the photo to find supplies. If you are going to use the drum, make sure the metal shelves are spaced appropriately for your samples. If you are using the tree, place the bottom acrylic plate specific for the tree on top of the condenser basin then place the tree with white o-ring on top of the plate.
Prepare your Samples
If your samples are particularly wet, freeze them before putting them in the freeze dryer and keep them frozen while waiting for condenser to reach -40 °C. You may need to use dry ice or liquid nitrogen to get your samples to freeze if they are rich in solutes.
Consider placing paper towel or kim wipe on top of an open sample container secured with a rubber band. Your sample material could creep up or even explode out the top of a vial, so take the time to secure your material inside the vial.
Wait
It is critical that you wait to start the vacuum pump until the condenser is below -40 °C. The vacuum pump does not want liquid water moving through it, so please be patient and wait.
Vacuum
Turn on vacuum by pressing the 'vacuum' button. IMPORTANT: Watch the vacuum pressure on the freeze dryer until the pressure reading is below 100 Torr, this should be a fairly rapid process. As the pressure decreases, check to see that all valves on top are closed (you can use a finger to check for suction or you can listen for a hissing noise. Allow approximately 15 minutes to pass, then return to ensure the pressure inside has reached below 100 mTorr.
Fill out the sign-in sheet. If you are uncertain how long it will take write down when you will be checking your samples. It is common to come back the next day, turn off vacuum, vent, only to find you need more time.
Clean-up
Turn the vacuum and condenser OFF by pressing each respective button in turn. Slowly turn one valve from top of dryer counter clockwise to vent dryer body (acrylic plastic drum manifold). Place hands firmly on opposing sides of drum manifold and angle to one side. Lift carefully off of base. Do not lift using top valves as handles, THEY WILL BREAK. Invert drum manifold and carefully place on countertop so that the bottom lip is accessible. DO NOT SET THE DRUM WITH O-RING SIDE DOWN ON THE FLOOR.
Remove the metal shelving unit and manifold adapter plate to access the condenser basin. Allow it to thaw and then drain and clean out condenser basin as necessary. You are welcome to place the drain hose in the plug and leave it to thaw in your absence.
Troubleshooting
Not Pumping Down
The two most likely reasons why the freeze dryer will not pump down are (1) the drain hose is still plugged in or (2) one of the valves on the drum is still open.
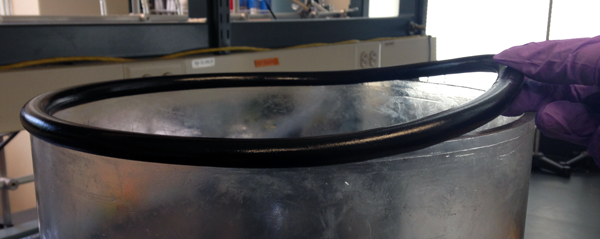
Another reason might be seals needing to be cleaned and greased. Put on Nitrile gloves (mostly because the grease is hard to wash off) and remove both the gasket that seals the drum to the plate and the gasket that seals the plate to the condenser basin. Clean as needed, then grease both gaskets using the Dow Corning high vacuum grease kept in the supply cabinet.
Control Panel Off, Buttons Not Working
Perhaps the switch on the back of the unit is off? Turn it on.
